Activities
Activities are designed to make it easy to work with influencers at scale. They are highly adaptable to your process. Having seen many different companies who work with influencers at scale Linkster built a system that can be tailored to the most common and most efficient ways of conducting these activities.
Also, activities cannot only be triggered individually but also by using the Linkster Bulk Wizard. Thus, you can send out dozens or hundreds of personalized briefings, content requests or insights upload requests at once.
Please talk to your Linkster contact person to set up your very own approach and save tons of time
There are three possible activities to manage your workflow with the influencers.
- Send Briefings
- Request & Approve Content
- Request & Add Insights
As there are different possibilities to organize and work with these activities (e.g., you could have a separate email for each activity or handle all activities with one email) the following part offers one example of how these activities could be applied.
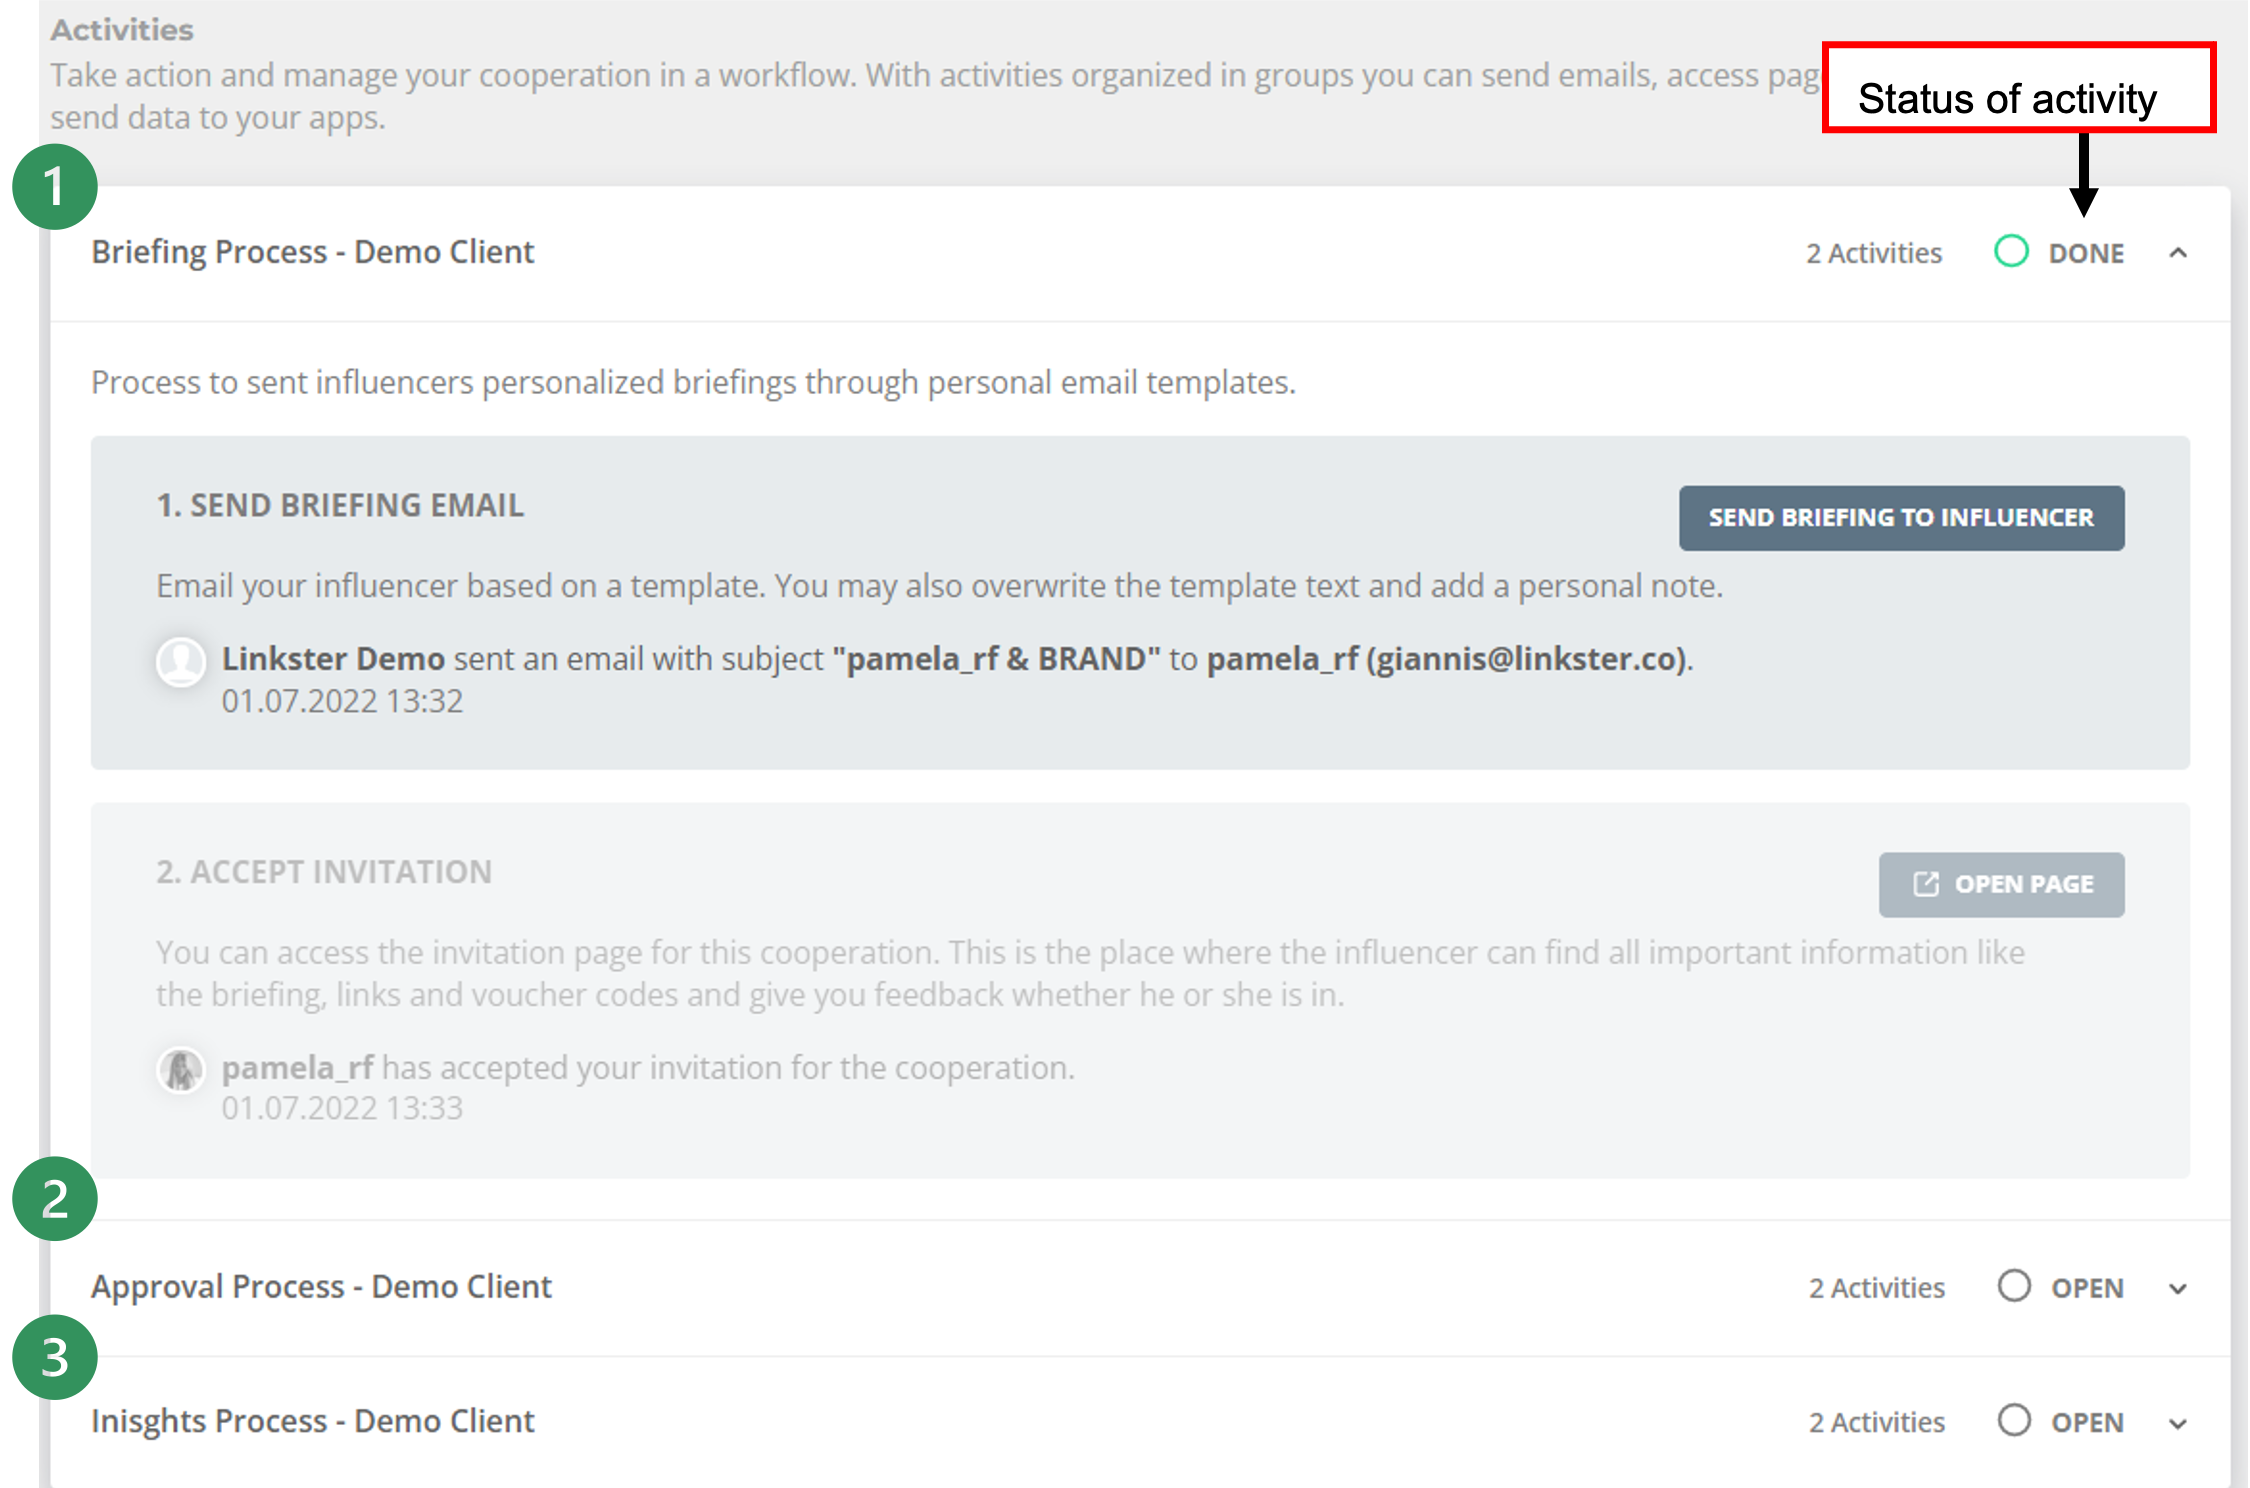 63: Activities - Overview
These activities are an optional tool to massively increase efficiency in your workflow and save you time. You do not need to follow the exact steps as proposed here.
As soon as the influencer participates in any activity (e.g. accepting the briefing, uploading content etc.), the person who is the assignee of the cooperation will receive an email about these activities.
Briefing Process
You can send the briefings automatically by opening the Briefing Process Activity and choosing "Send Briefing to Influencer".
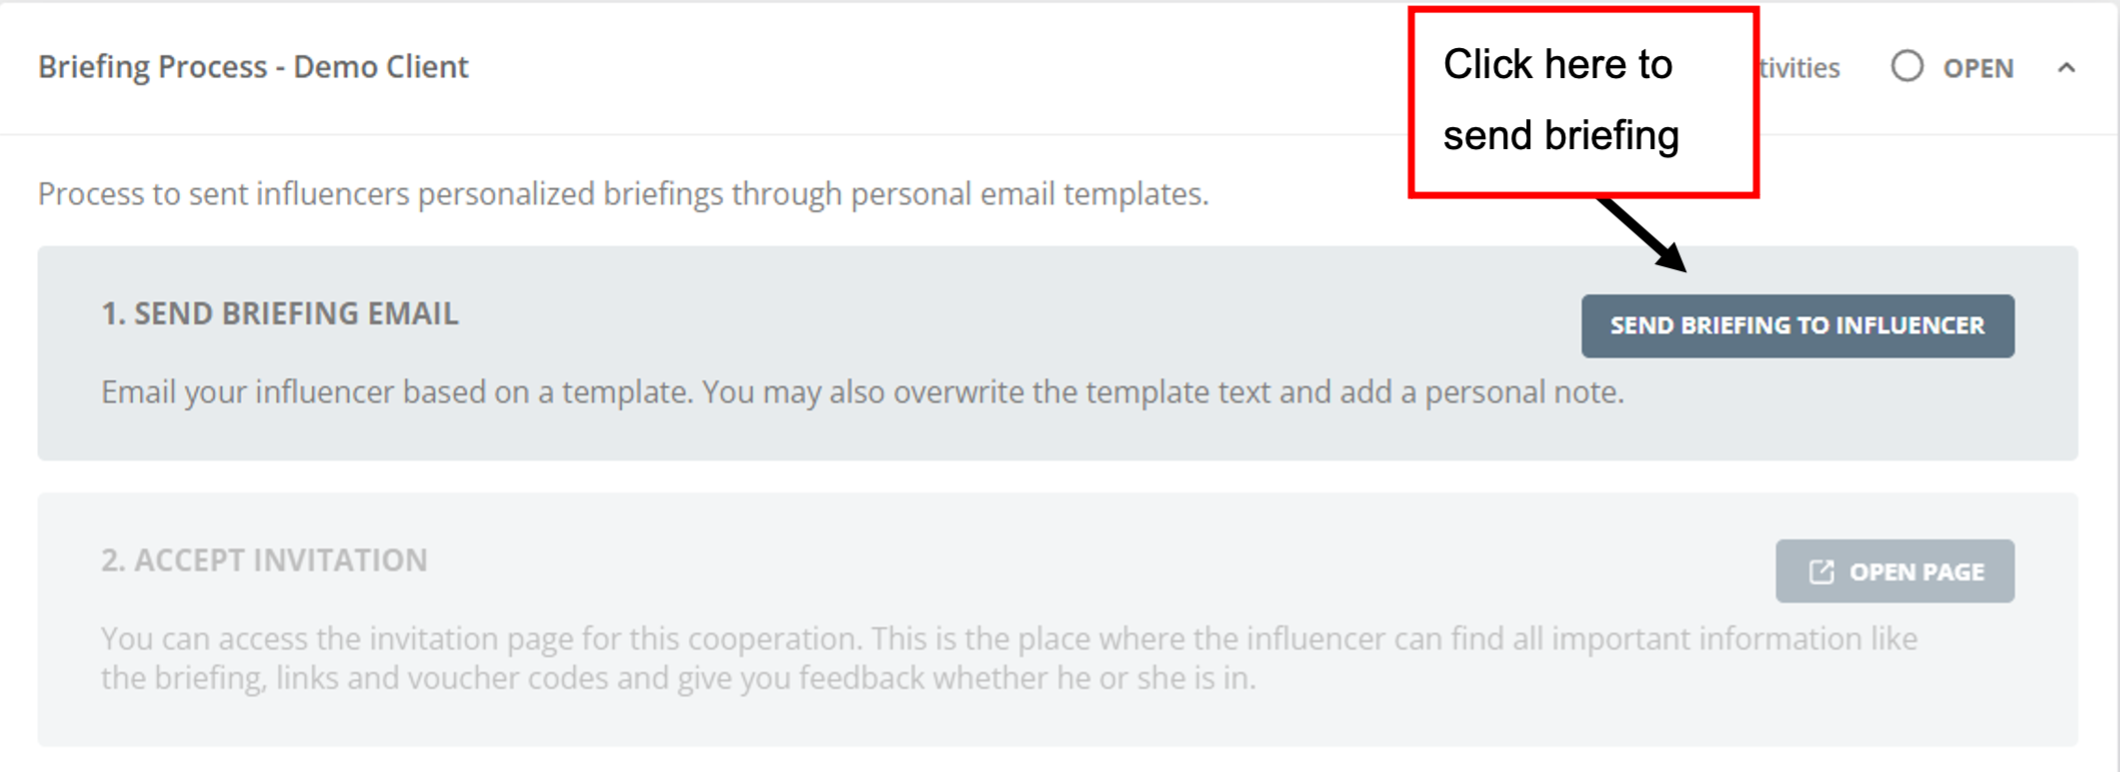 64: Briefing Process_Send Briefing
A new window will open where you can either write a new E-Mail or choose a pre-designed E-Mail Template. The following example shows, how an influencer would then receive the email and the briefing:
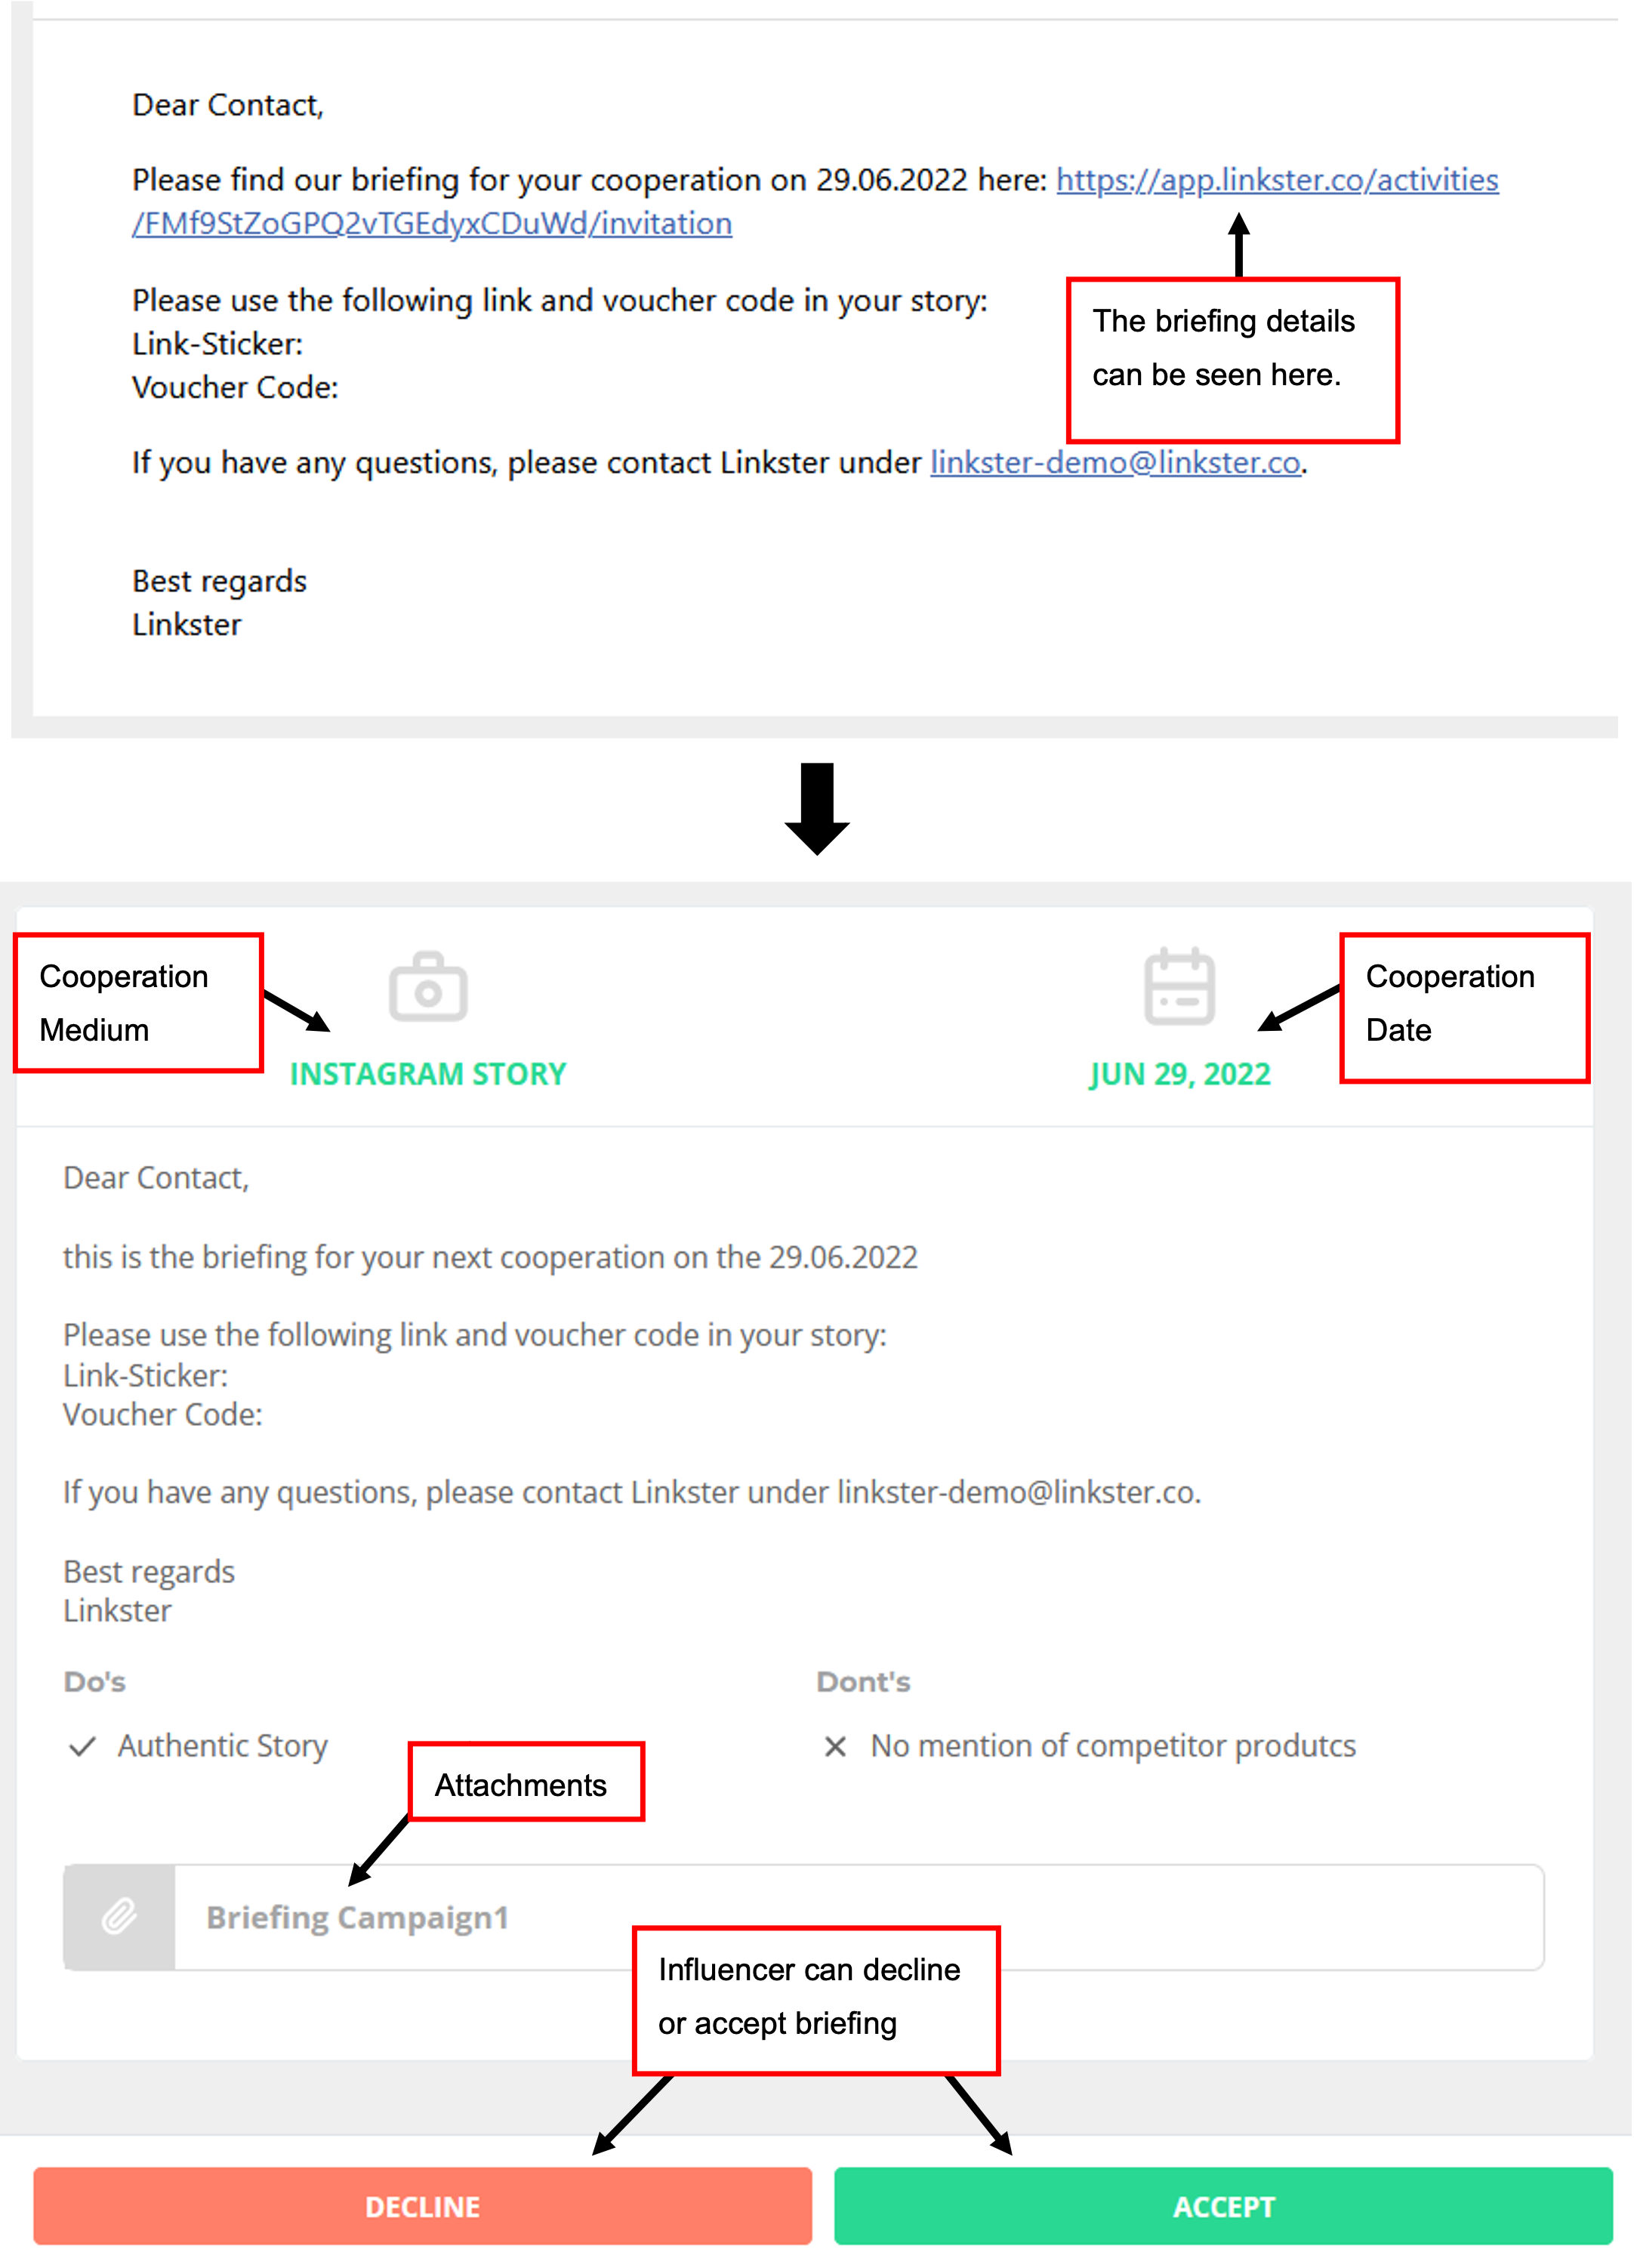 65: Briefing Process - Example Influencer
As soon as the briefing is sent and / or accepted, the labels in the respective campaign will change automatically to mirror the current state of process. Once the influencer accepts or declines the briefing, the assignee of the cooperation will receive an email-notification.
Approval Process
You can send an E-Mail to your influencer to request that they upload content for approval. To do that, open the Approval Process Activity and choose "E-Mail to request content for approval". You can then either type a new E-Mail or choose a predefined E-Mail template that will be sent.
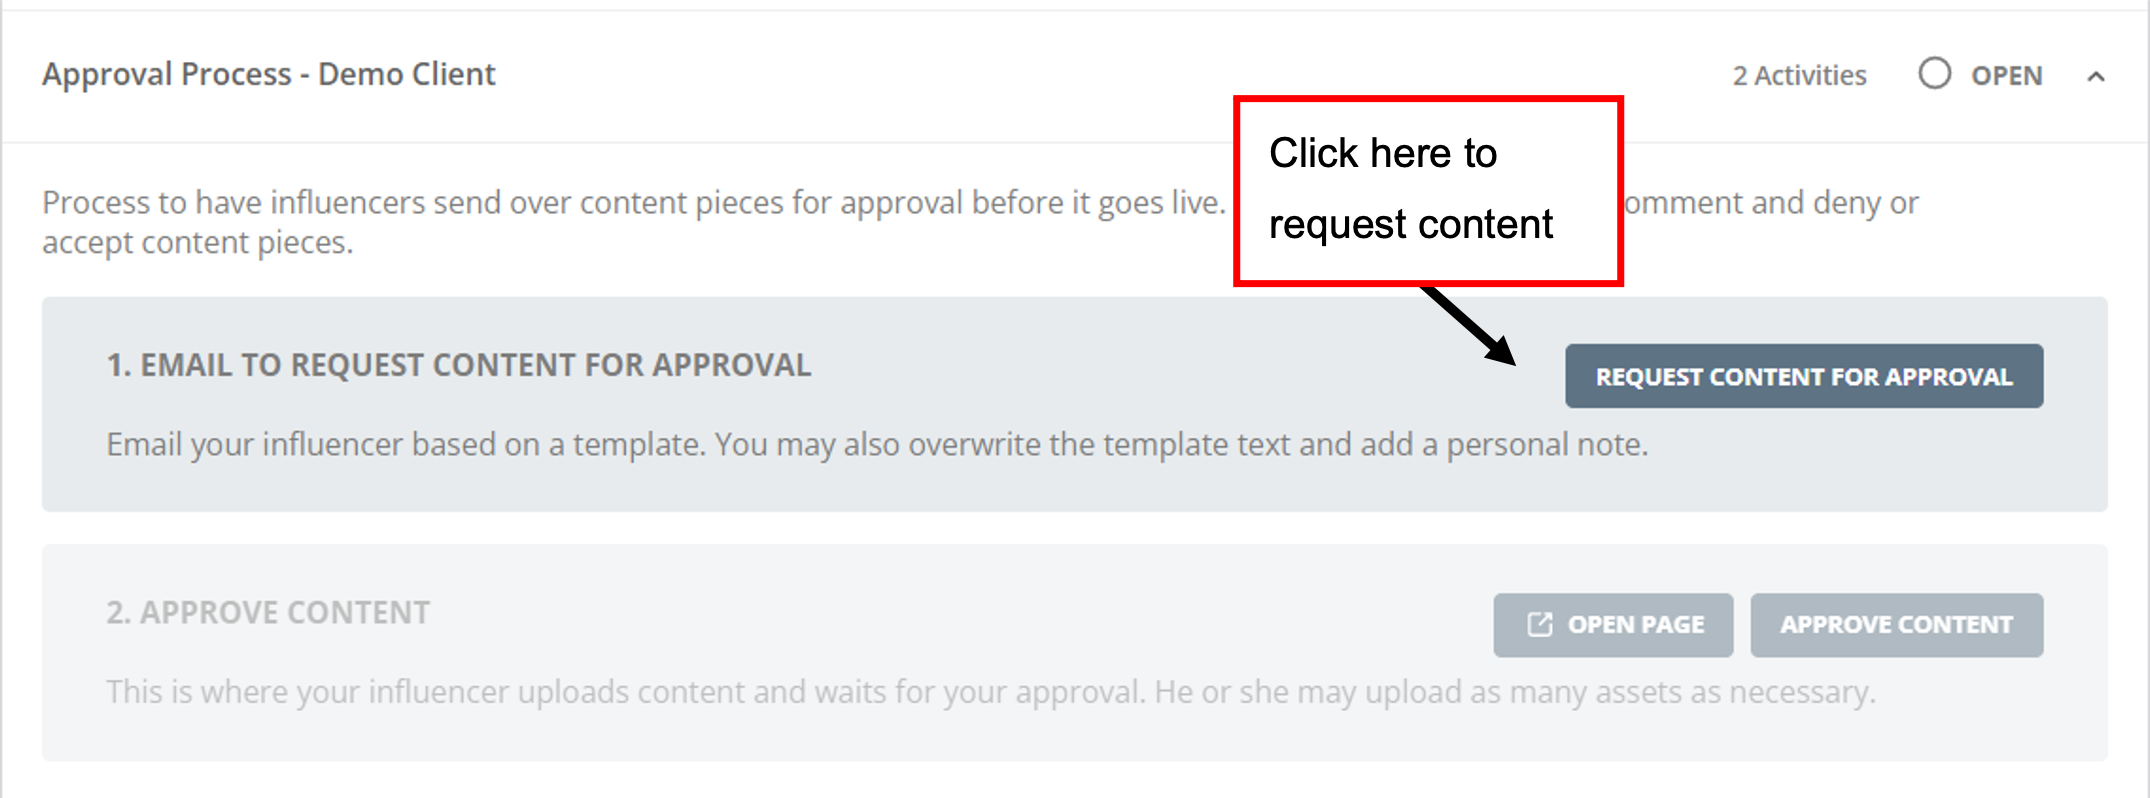 66: Approval Process_Request content
The influencer will receive an Email with a link to page, where they can upload the required content.
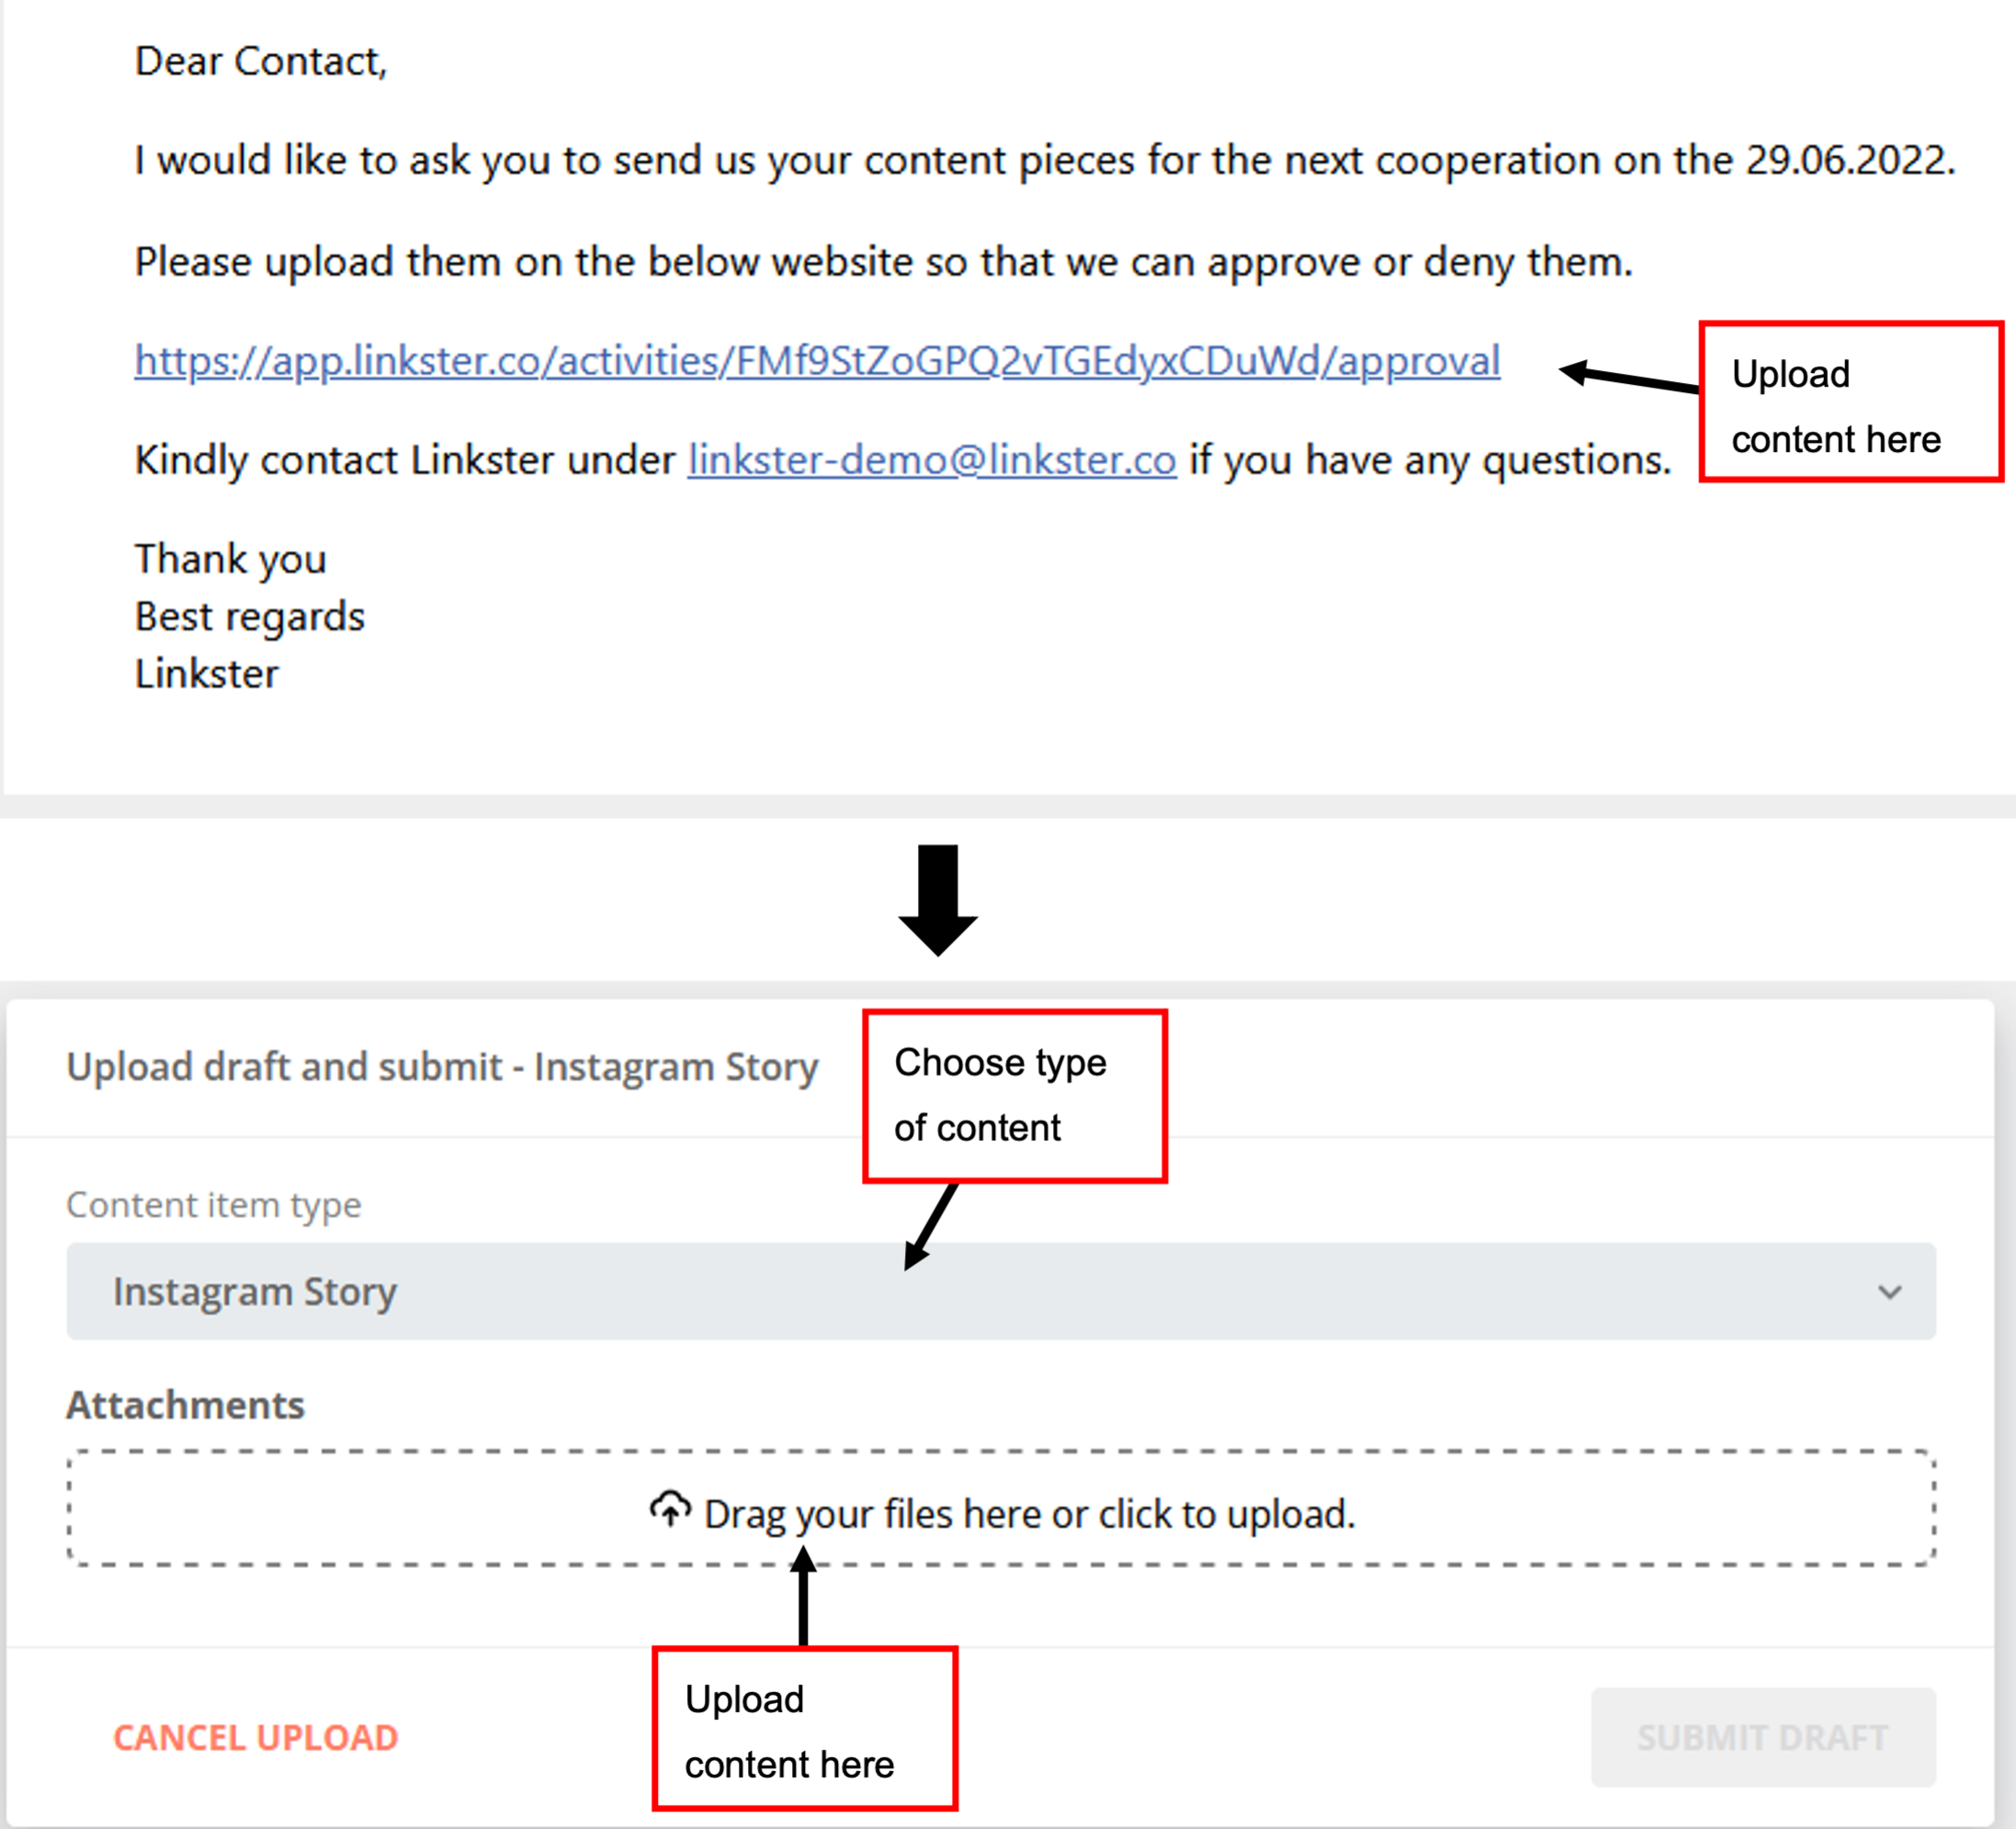 67: Approval Process - Example Influencer
As soon as the influencer has uploaded content, the assignee of the respective cooperation will receive an email-notification.
There are two options to approve uploaded content.
-
Open the individual cooperation. Under the Approval Activity, you will find the button "Approve Content". A new window will open which displays the submitted content piece, the cooperation details and the options to approve or decline. You can further add a comment for the influencer, which will be included in the email that they receive once the content has been accepted or declined.
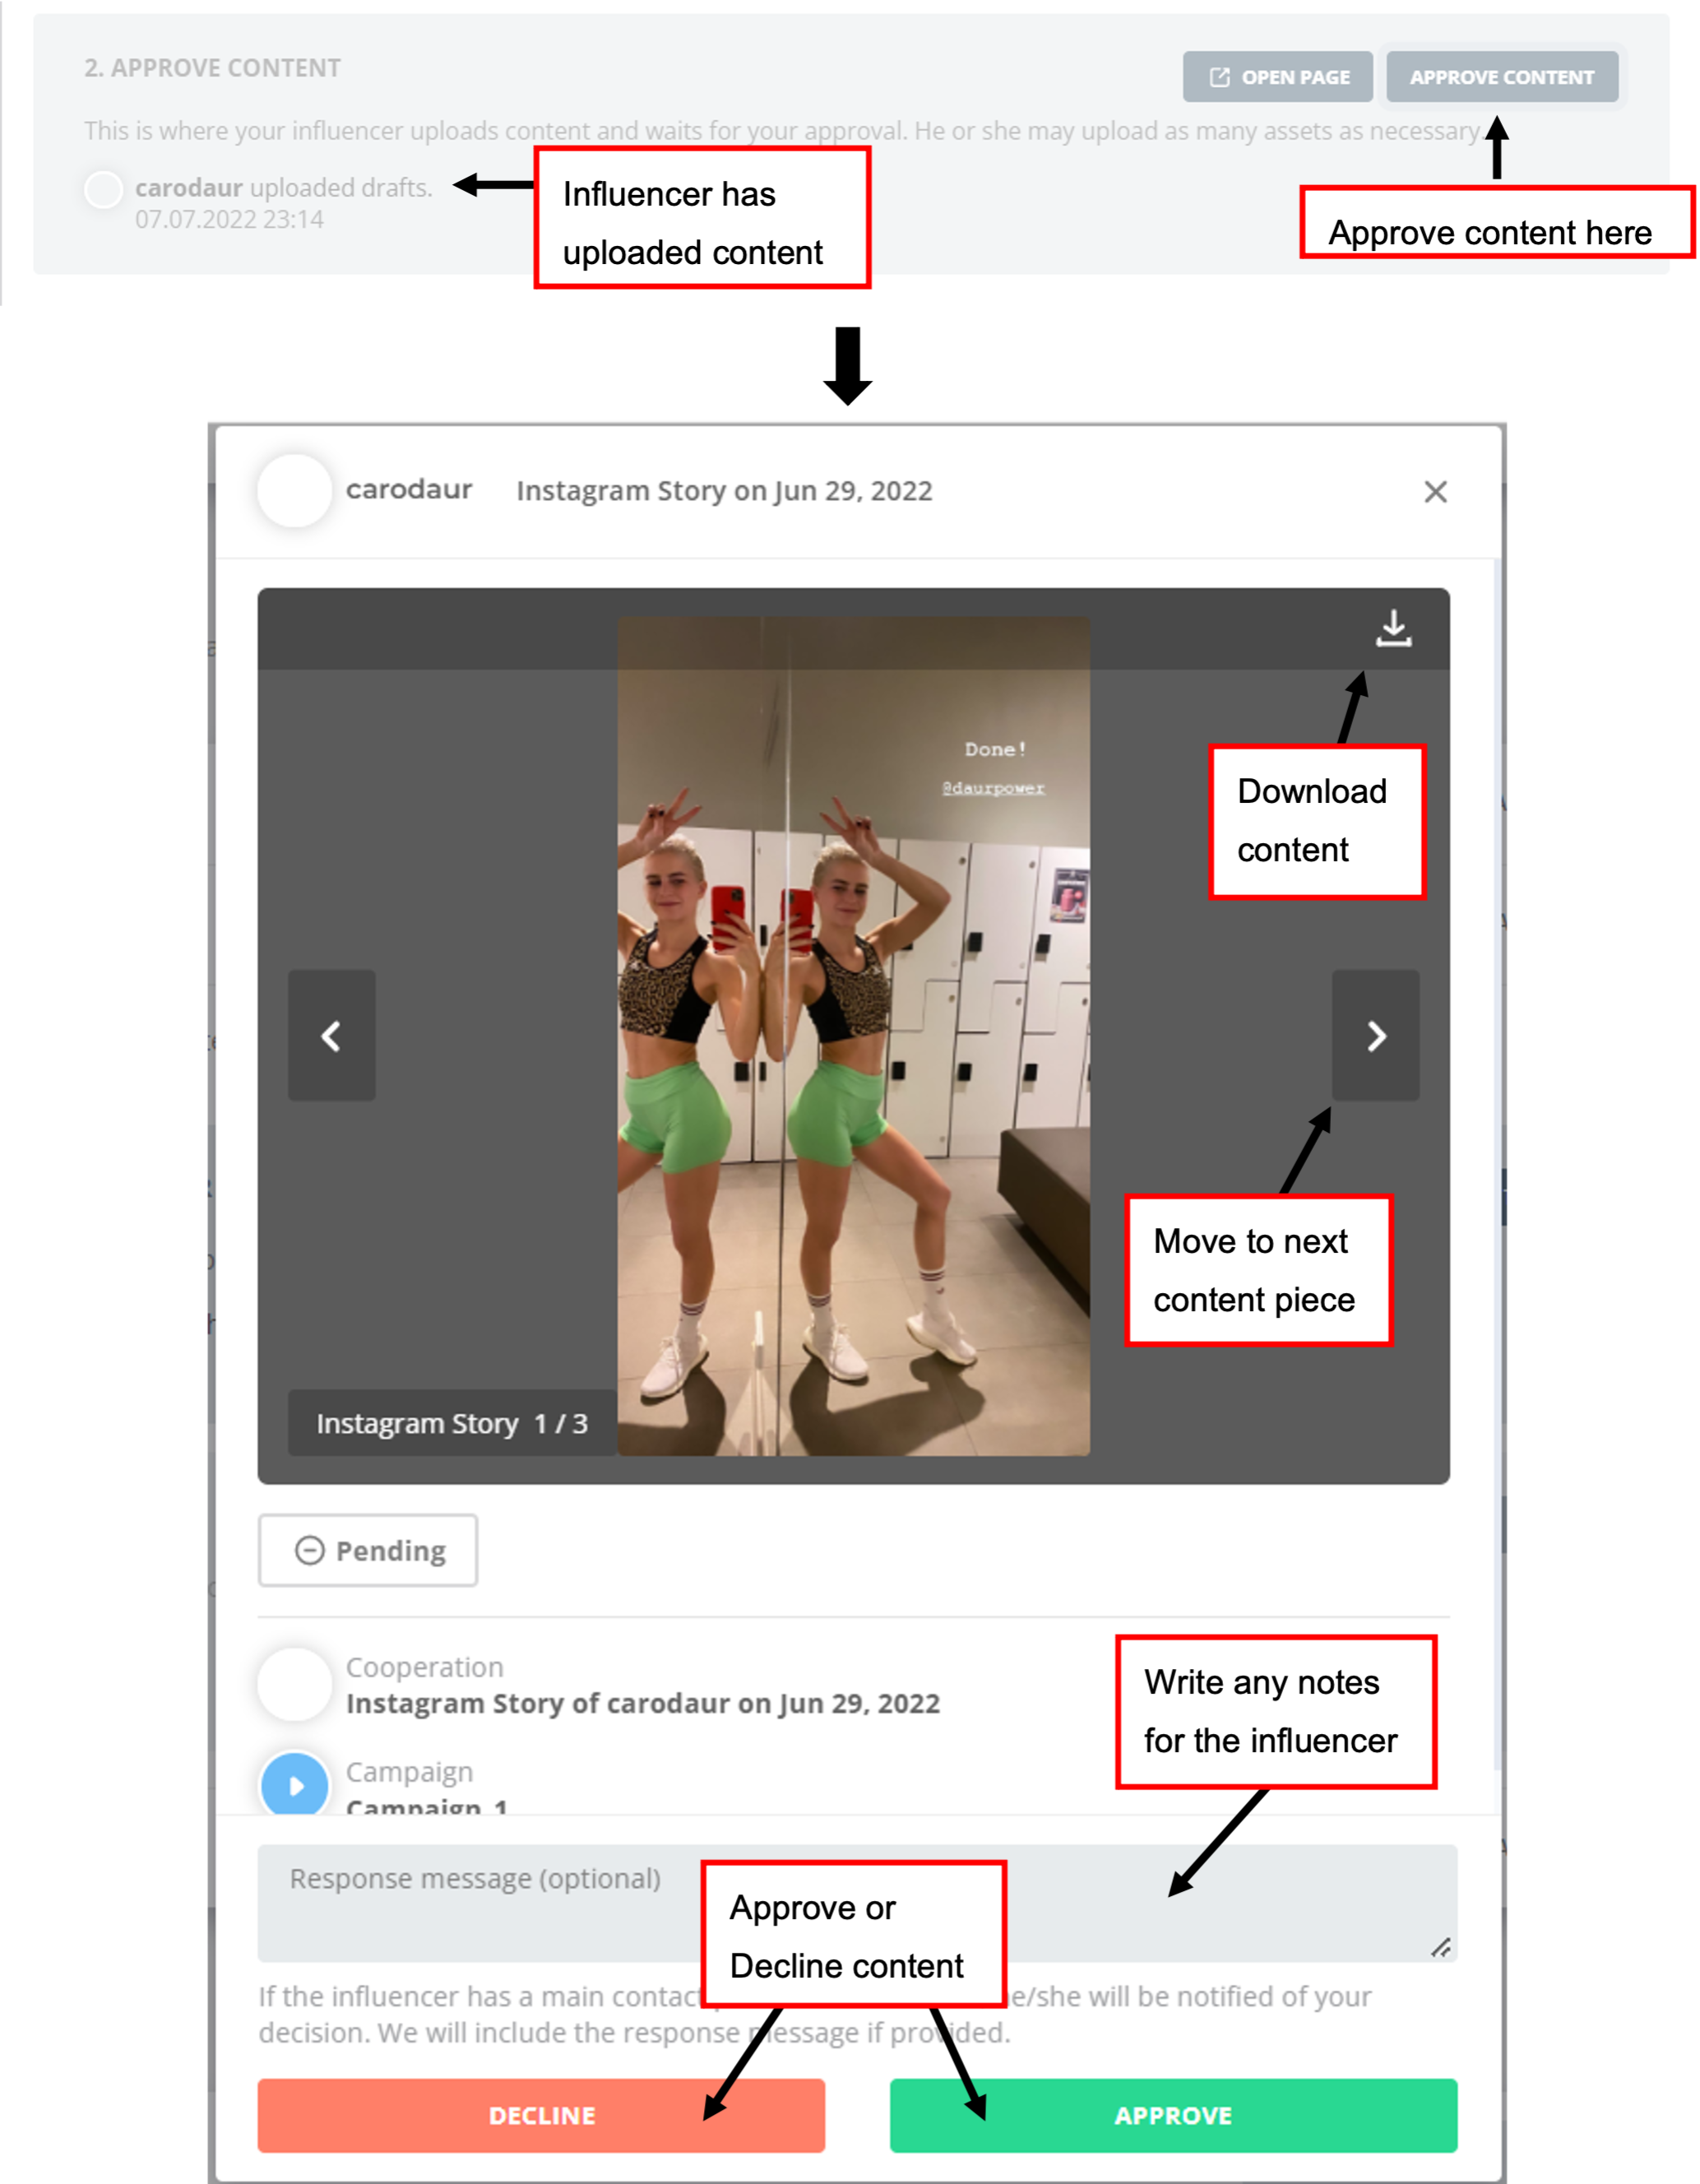 68: Approval Process - Approve Content
 -
All content that has been uploaded for approval (both pending and done) can also be found in the Approval Hub. This is central for all campaigns and all influencers, but you can use the filter function to search for specific factors. By clicking on "Details", the same window as under 1. will pop up and give you the option to decline or approve a post.
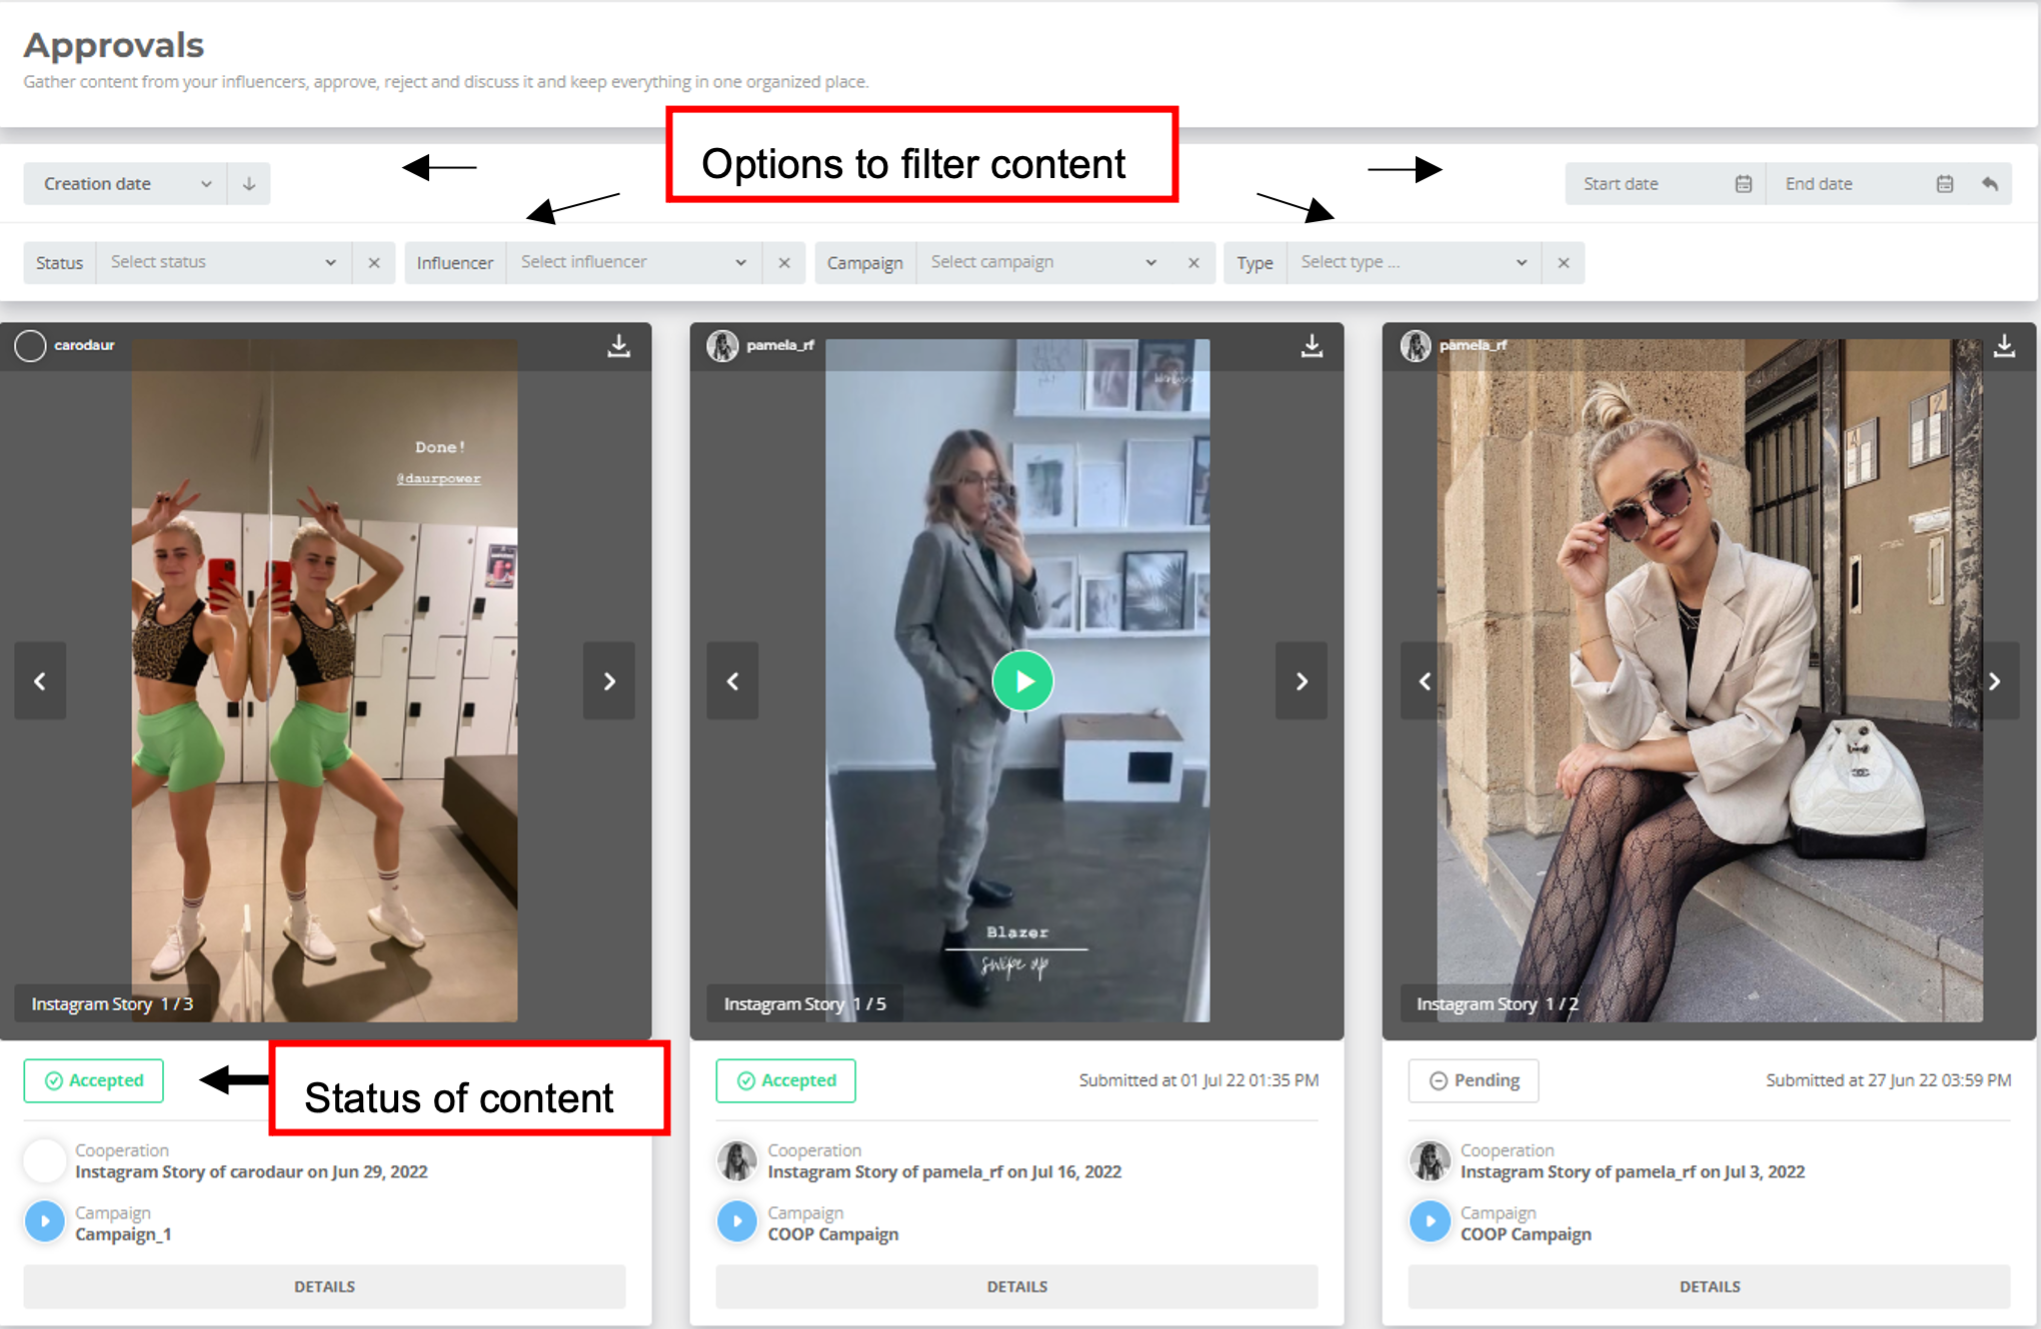 69: Approval Process - Approval Hub
Once you have reacted to the content, the influencer will receive an automatic E-Mail with the information on whether the post has been accepted or declined. This looks like this:
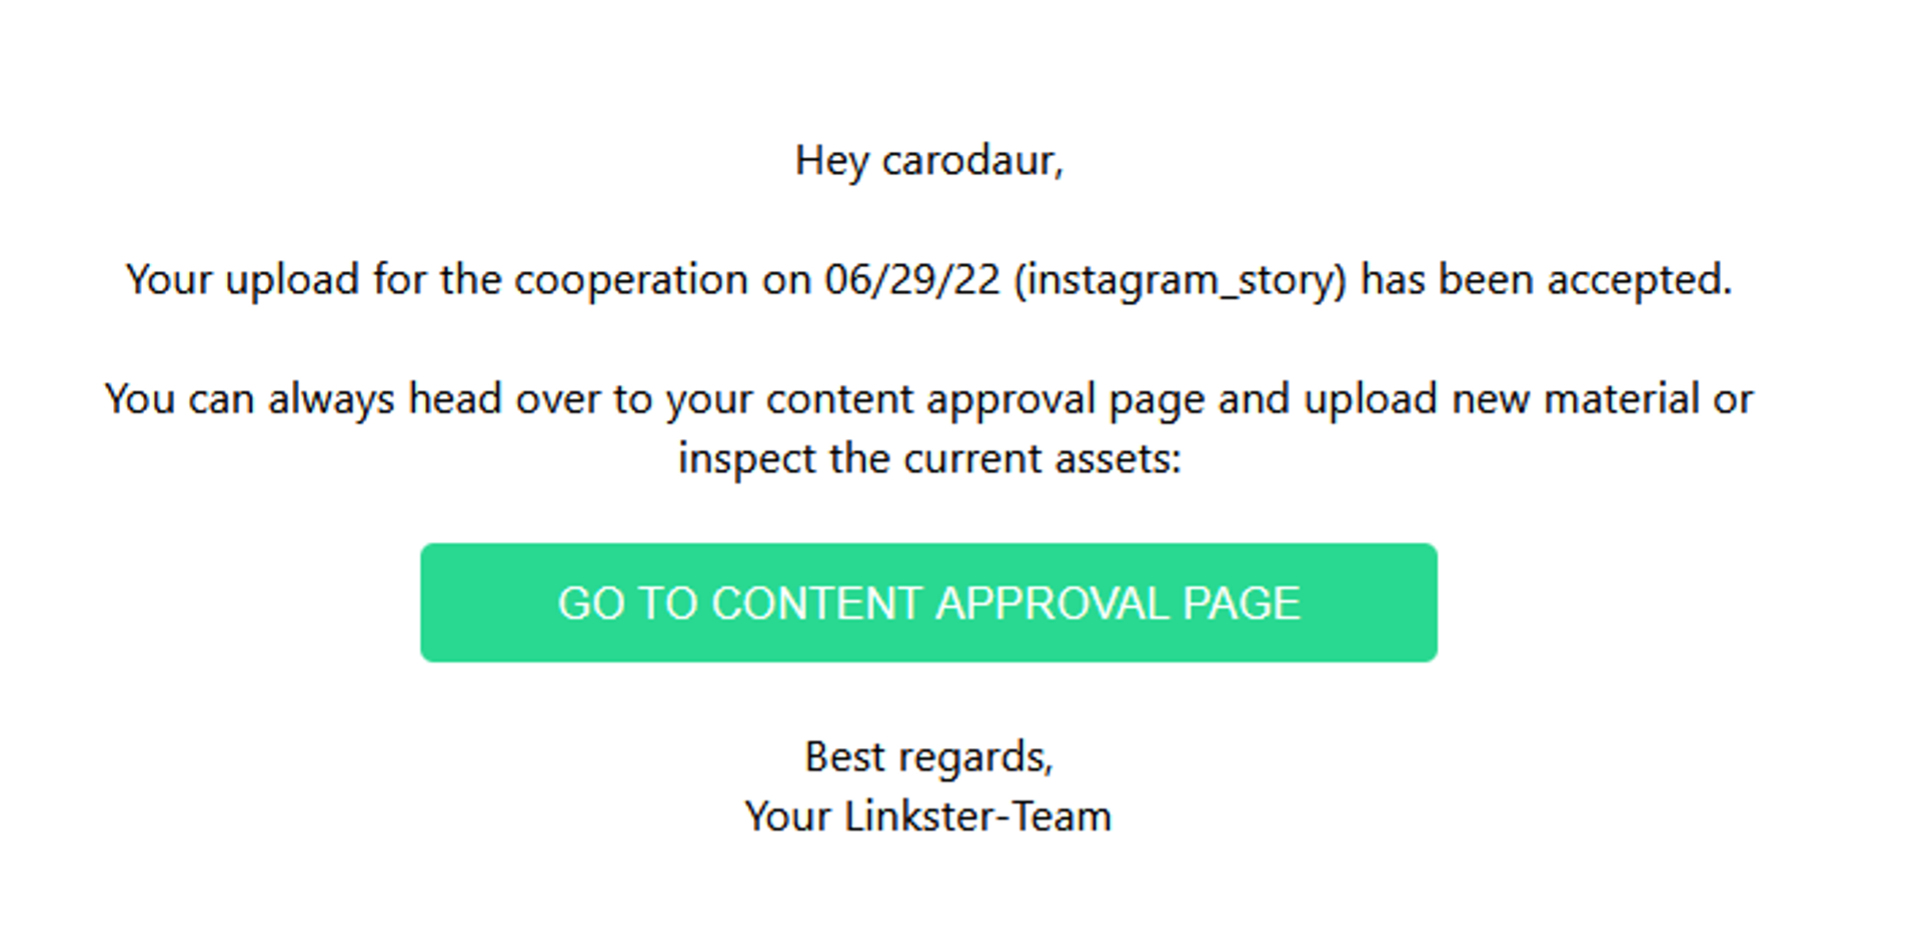 70: Approval Process - Approval Email
Insights Process
You can send an E-Mail to the influencer, asking them to upload the insights of their collaboration. Open the activities and choose Insights Process. Then click on "Email to request insights upload". You can either type a new E-Mail or select a pre-defined E-Mail template.
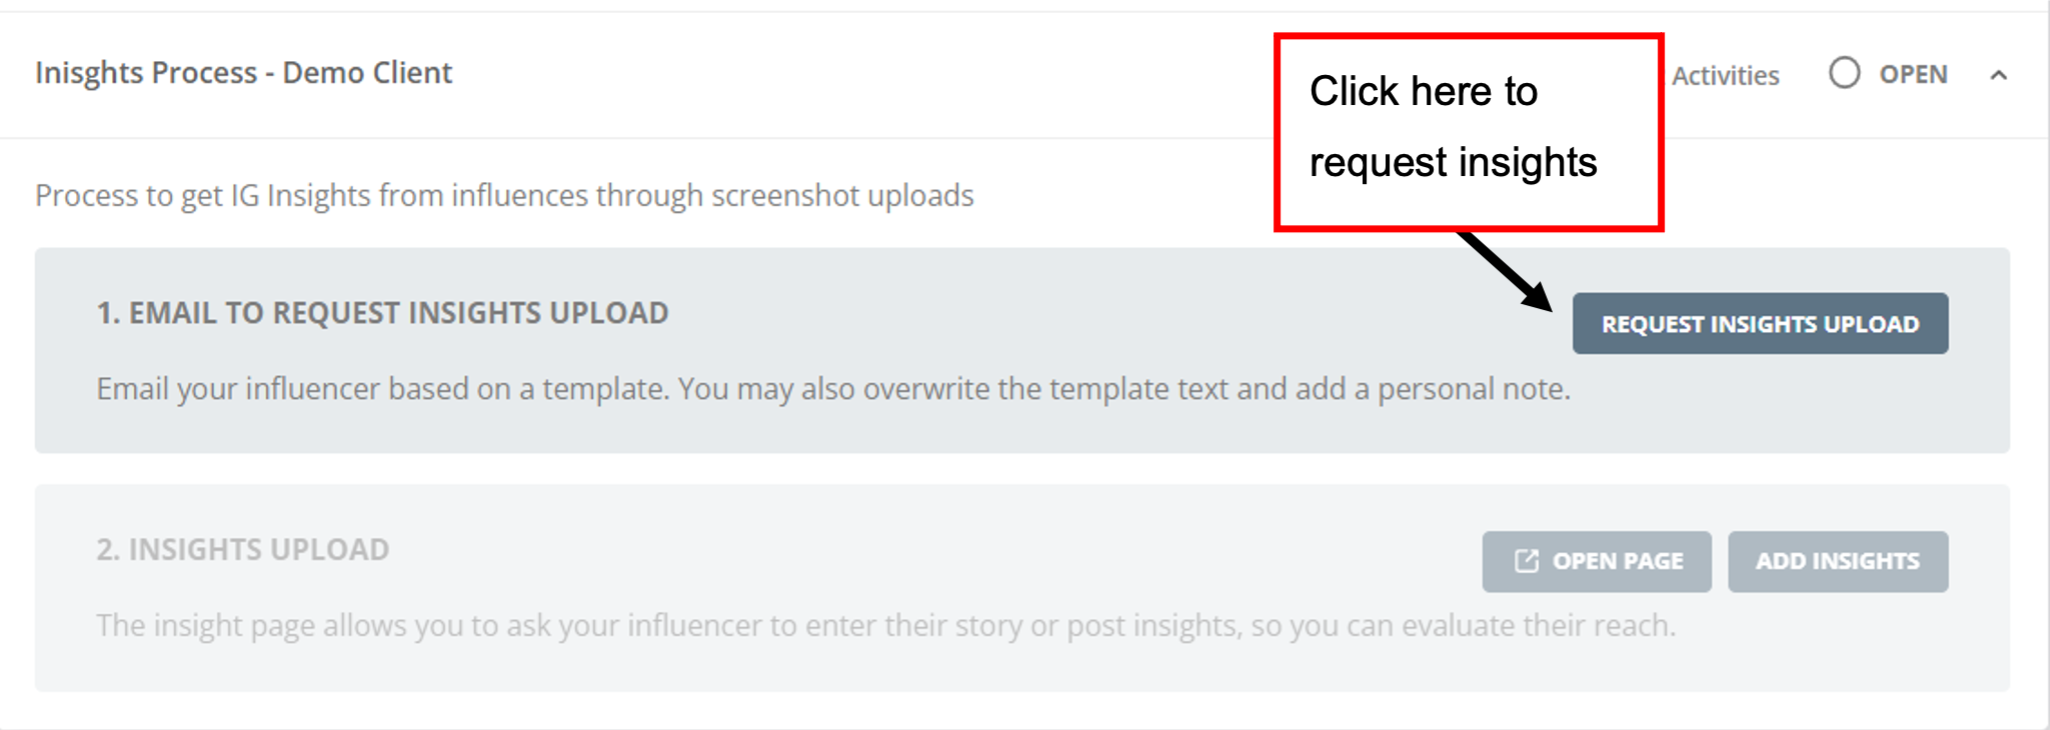 71: Insights Process - Request Insights
The influencer will receive an Email with a link to page where they can upload the insight.
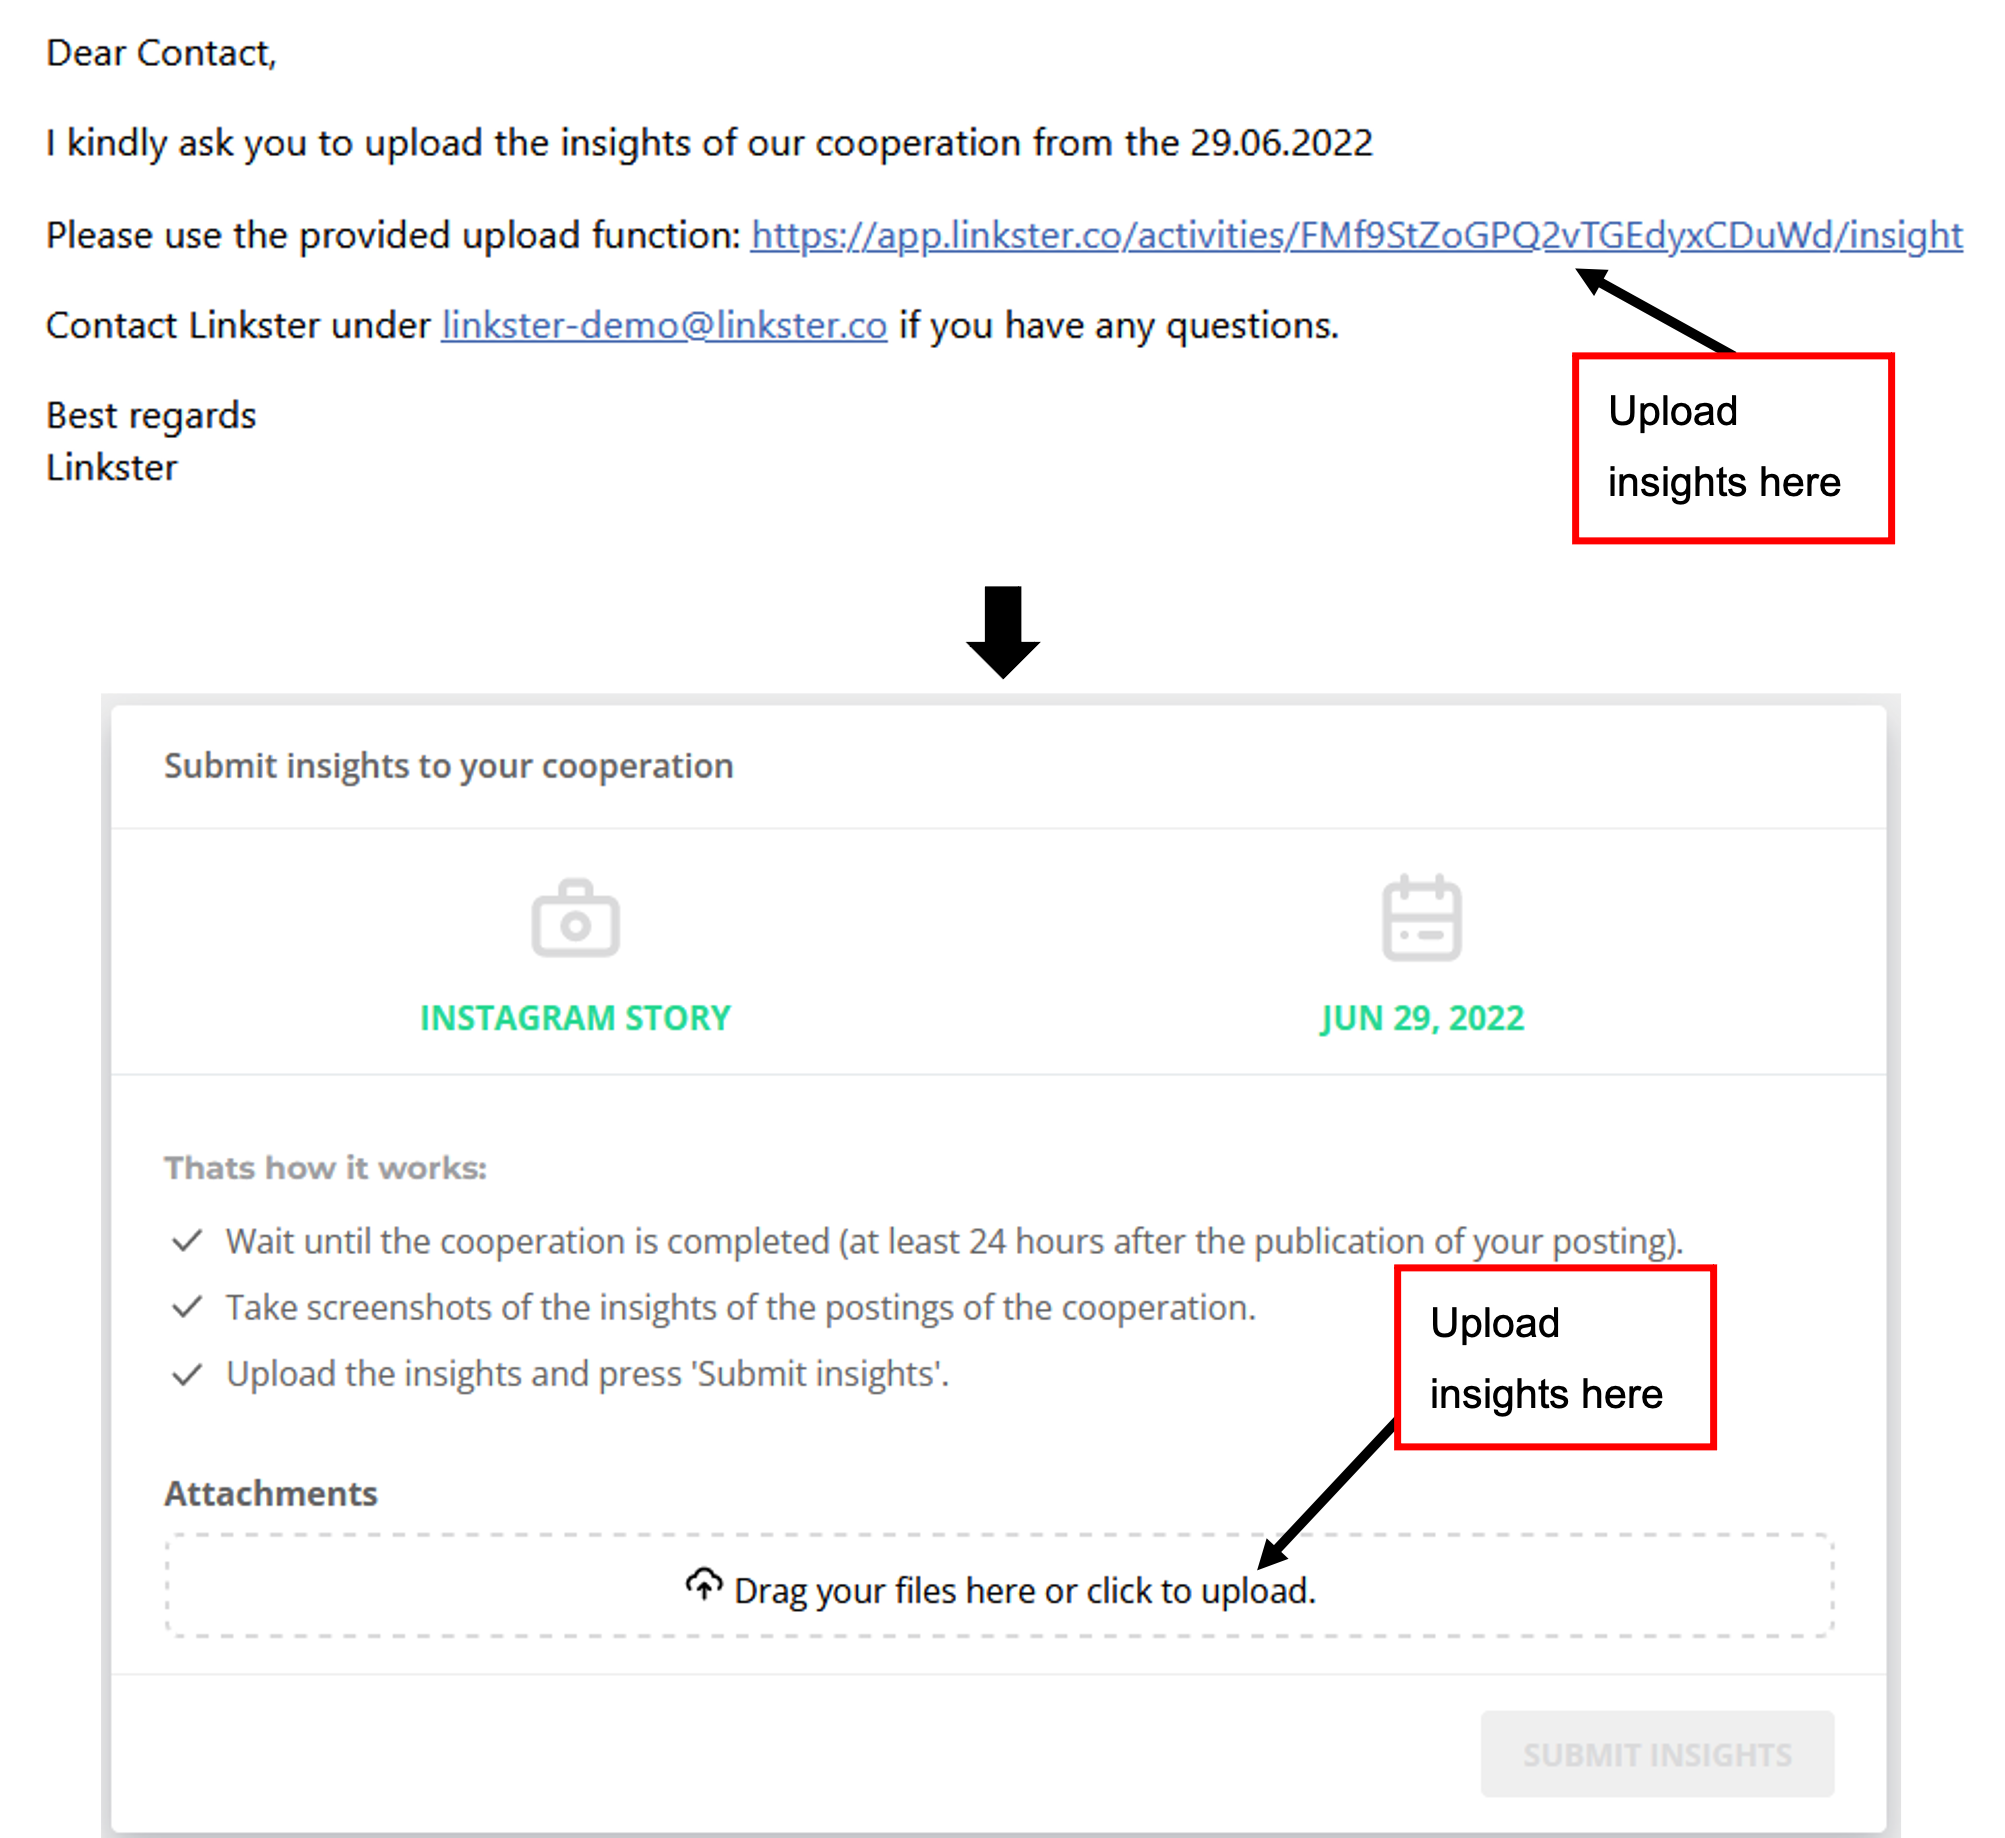 72: Insights Process - Example Influencer
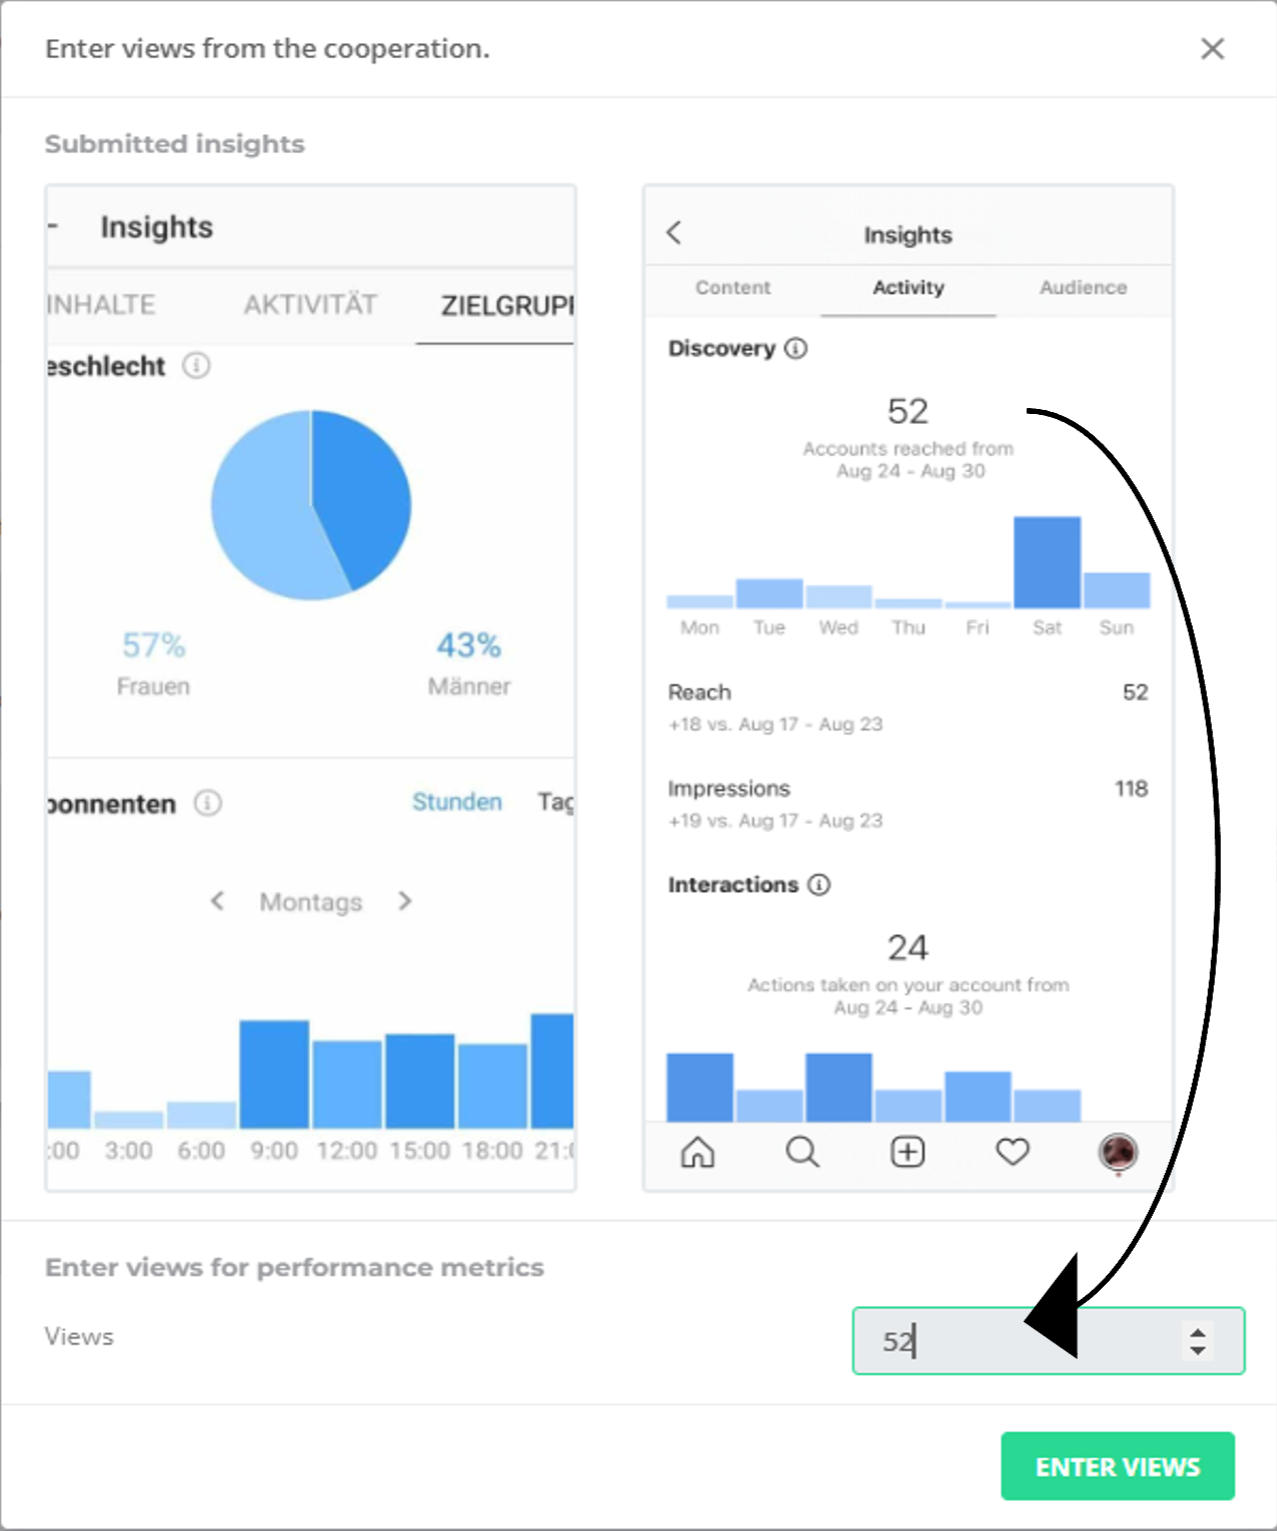
As soon as the influencer has uploaded the insights, the assignee of the respective cooperation will receive an Email-notification. After the influencer has submitted the insights, you can view them and add them to your performance data under the button "add insights".
 73: Insights Process - Add Insights (1)
In the window that opens, you can transfer the number of views to the analytics by typing them in the provided field:
 74: Insights Process - Add Insights (2)
These are used for your performance data and are transferred to the analytics. There Linkster will then automatically calculate KPI's like CPM, Click-through-Rate, View-Follower Ratio or other view-related KPI's you will find useful.